Unlock the Secret to Perfect Fried Eggs Every Time
There's a reason the humble fried egg holds such a revered spot on breakfast menus and in home kitchens around the world. It’s a culinary chameleon, capable of transforming from a simple protein into the star of any meal. Yet, for many, achieving that elusive diner-style perfection – a glistening, runny yolk cradled by a beautifully flat, evenly cooked white – feels like a chef's secret. Good news: it’s not! Mastering how to fry an egg perfectly is entirely within your reach, regardless of your cooking experience. This comprehensive guide will walk you through every step, ensuring you achieve not just a perfect runny yolk, but also those coveted flat whites, without intimidation.
From the sizzle of the butter to the gentle flip for an over-easy, we’ll cover the nuances that elevate a simple egg to an extraordinary one. Whether you're a fan of a classic sunny-side up, prefer an over-easy with a slightly firmer yolk, or even an over-hard for a fully set experience, these foundational techniques will serve you well. So, grab your pan, and let's demystify the art of frying eggs like a pro.
The Essentials: Tools, Ingredients, and Smart Prep
Before you even think about cracking an egg, ensuring you have the right setup and quality ingredients makes all the difference. It's the foundation for learning how to fry an egg successfully.
- The Pan: A good quality nonstick pan is your best friend here. Its slick surface prevents sticking and allows for easy maneuvering and flipping. While cast iron can give you beautiful crispy edges, nonstick is generally more forgiving for beginners aiming for flat whites and easy release. Choose a small pan, ideally 8-10 inches, to ensure the egg cooks evenly and maintains a rounded shape.
- The Fat: Butter is highly recommended for its rich flavor and ability to create a lovely golden-brown crust on the whites. Use about 1 teaspoon for a single egg. If you prefer a neutral flavor or need a higher smoke point, a neutral oil like canola, vegetable, or a light olive oil works well too. A combination of butter and a touch of oil can offer the best of both worlds.
- The Egg: Fresh eggs are paramount. Fresher eggs tend to have thicker whites that hold their shape better, leading to those desirable rounded whites and centered yolks.
- Essential Tools: A thin, flexible plastic spatula is crucial for flipping without breaking the yolk. A small pinch bowl or ramekin for pre-cracking the egg is a game-changer.
Pre-Frying Prep: The Pro-Chef's Secret
This simple step is often overlooked but significantly reduces the risk of common frying mishaps:
- Crack into a Bowl: Instead of cracking the egg directly into the hot pan, gently crack it into a small bowl first. This allows you to easily fish out any stray shell fragments before they hit the pan. More importantly, it gives you much greater control when pouring, reducing the chance of breaking the yolk and allowing you to guide the egg into a perfect, rounded shape in the pan.
- Heat Management: Place your nonstick pan over medium heat. Add your chosen fat (butter or oil). Watch it closely. If using butter, it should melt and just start to foam slightly. This indicates it’s at the perfect temperature – hot enough to cook, but not so hot it will scorch the egg. Give the pan a swirl to ensure the fat evenly coats the bottom.
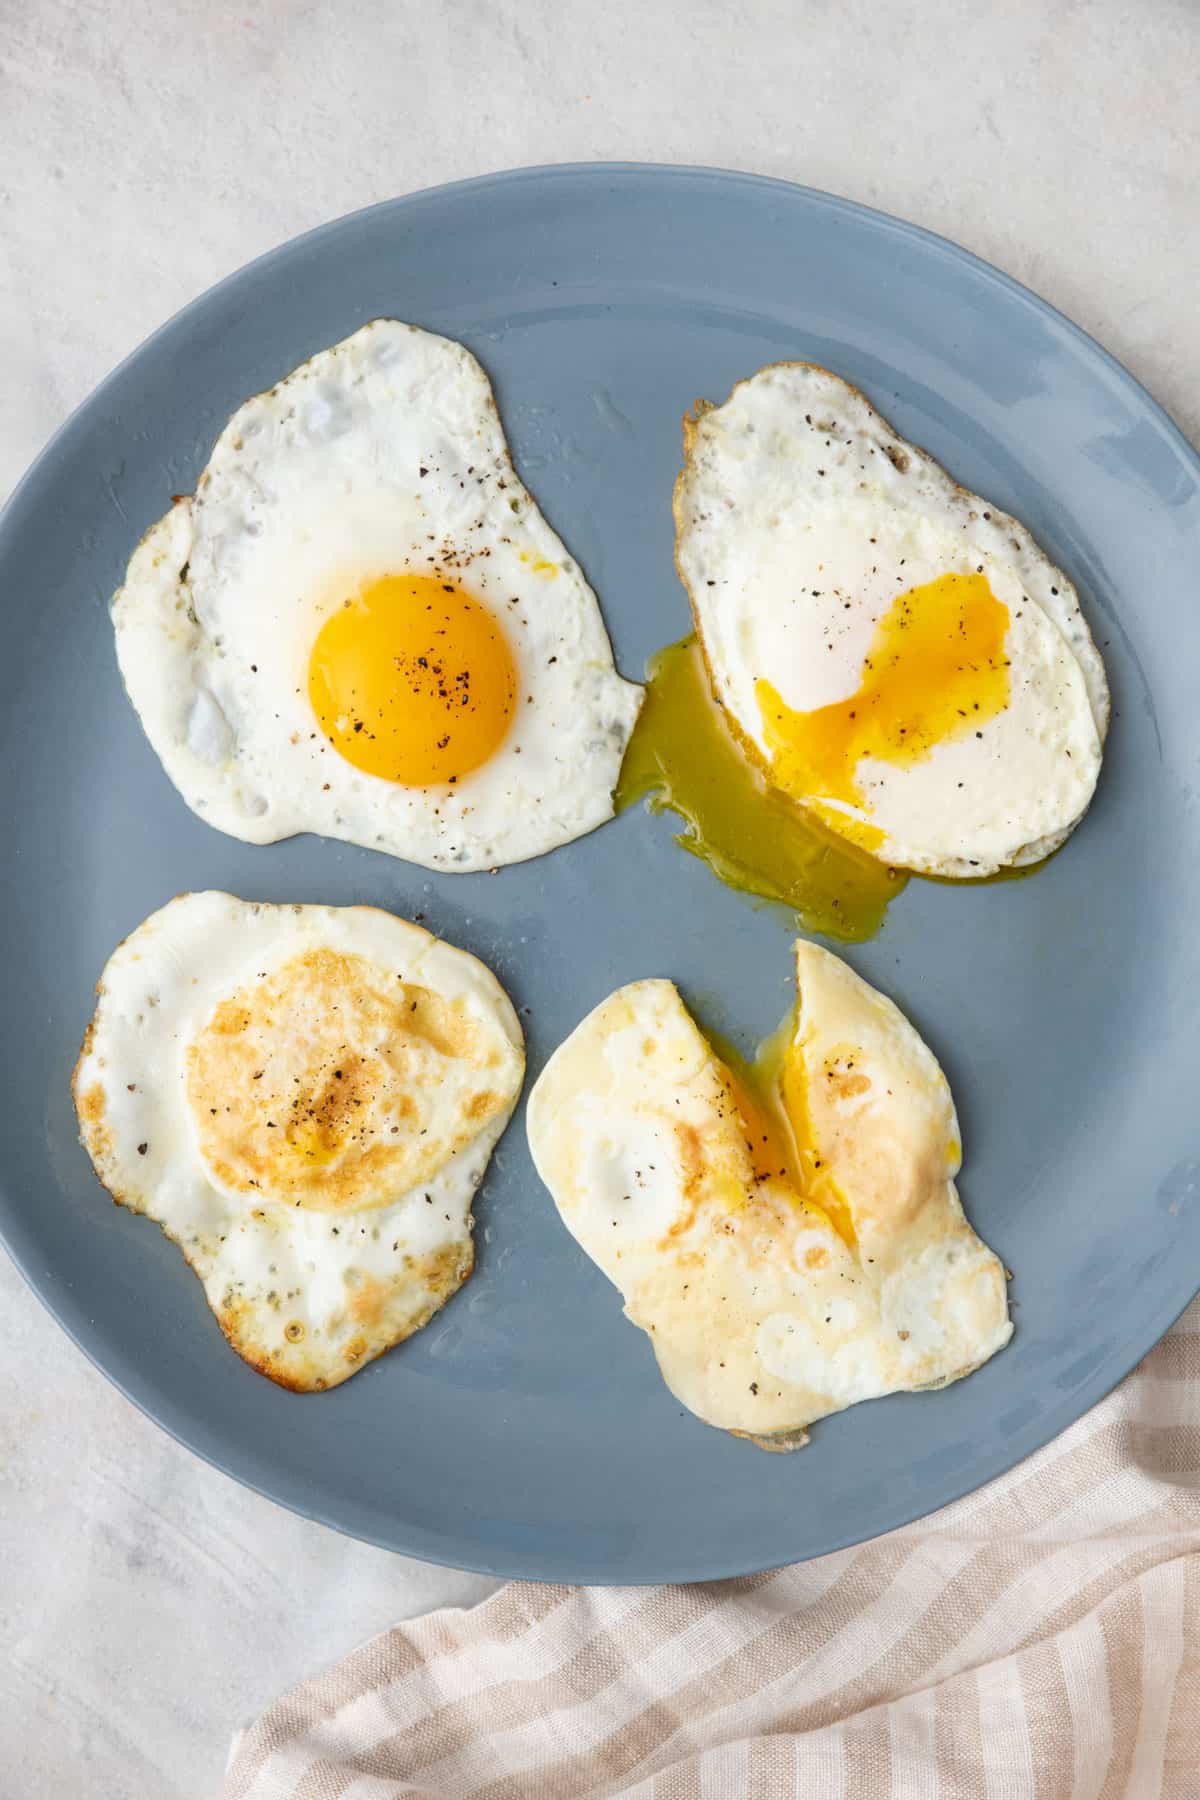
Mastering the Sunny-Side Up: Runny Yolks & Flat Whites
The sunny-side up is the quintessential fried egg, renowned for its shimmering, unbroken yolk and tender white. Here’s how to achieve perfection:
- Gentle Pour & Season: Once the butter is foaming gently, carefully pour the egg from your bowl into the center of the pan. Immediately season with a pinch of salt and freshly ground black pepper (optional, but highly recommended).
- Lower the Heat: As soon as the egg is in the pan, reduce the heat to medium-low. This is crucial for slow, even cooking that prevents crispy, burnt edges while ensuring the white sets completely. You should hear a gentle, consistent sizzle – not a fierce crackle.
- The Flat White Technique (Optional, but Highly Recommended): For those pristine, flat whites, gently take a fork and carefully poke at the thicker, higher-sitting parts of the egg white, especially where it meets the thinner, flatter sections. The goal is to break the surface tension, allowing the thick white to spread out more evenly. This ensures consistent cooking and a beautiful presentation.
- Cook to Perfection: Continue cooking until the whites are fully set but the yolk remains beautifully runny. This typically takes about 3 minutes. Keep a close eye on the temperature; if it’s too high, the whites will bubble and crisp, and the yolk might develop white spots or "eyes." If it’s too low, the egg will take too long to cook, and the white might not set properly.
- Finishing Touches for Stubborn Whites: If, after about 3 minutes, the very top of the egg white still looks a bit translucent or "slimy," you have a couple of options:
- Butter Basting: Add a tiny knob of fresh butter to the pan. Once melted, gently spoon the hot butter over the uncooked white until it sets. This adds flavor and helps cook the top without cooking the yolk further.
- Steaming (Use with Caution): Add 1 teaspoon of water to the pan and immediately cover it with a lid for about 15 seconds. The steam will quickly set the top white. Be aware that this method can sometimes create a thin, cloudy film over the bright yellow yolk, slightly diminishing its vibrant appearance.
Once the whites are set and the yolk is perfectly molten, gently slide the sunny-side-up egg onto your plate. Pure breakfast bliss awaits!
Beyond Sunny-Side Up: Exploring Other Fried Egg Styles
While the runny yolk of a sunny-side up is a classic, there are other fantastic ways to fry an egg, catering to every preference:
- Over-Easy: Follow the initial steps for sunny-side up, cooking until the white is just set but the top of the yolk is still very runny – about 1-2 minutes. Using your spatula, carefully slide it under the egg and quickly flip it. Cook for only 30 seconds to 1 minute more on the second side, just enough to set the bottom white, leaving the yolk completely runny.
- Over-Medium: For a slightly firmer, jammy yolk, cook the over-easy egg for about 1.5 to 2 minutes after flipping. The yolk will still be soft and pliable but less liquid.
- Over-Hard: If you prefer a completely firm, fully cooked yolk, flip the egg and cook for 2-3 minutes or longer on the second side, gently pressing down on the yolk with your spatula if needed to ensure it cooks through. The yolk will be solid, making it perfect for sandwiches.
Pro Tips for Frying Eggs Every Time
- Don't Overcrowd the Pan: Cook eggs one or two at a time, depending on your pan size. Overcrowding drops the pan temperature and leads to uneven cooking.
- Serve Immediately: Fried eggs are best enjoyed straight out of the pan. Have your toast, avocado, or whatever accompaniments ready!
- Experiment with Seasonings: Beyond salt and pepper, consider a sprinkle of paprika, chili flakes, a dash of hot sauce, or fresh herbs like chives for an extra flavor kick.
- Use Fresh Eggs: As mentioned, fresh eggs have stronger, thicker whites that hold their shape better, preventing "runny" whites that spread too thin.
- Clean as You Go: Wipe your pan clean with a paper towel immediately after serving, while it's still warm, to prevent any cooked-on bits from hardening.
Conclusion
Frying an egg might seem deceptively simple, but as you’ve learned, a few key techniques and a little attention to detail can elevate it to a culinary triumph. From controlling your heat and pre-cracking your egg into a bowl, to mastering the flat white technique and understanding the nuances of flipping, you now possess the knowledge to fry eggs like a true professional. Don't be afraid to experiment and find your perfect preference. With practice, that gloriously runny yolk and perfectly set white will become a consistent, delightful reality on your plate. Enjoy the simple, yet profound, satisfaction of a perfectly fried egg!
